Monday, February 28, 2011

Puppy leather jacket

Ok, so today was my first day back at school after February vacation.  I am EXHAUSTED!  I had to make a project for my "Teaching English as a Second Language" course, as well as teach my class, grade papers, etc.  I already need a day off.

So here is a project I am working on, and once it is completely finished I will be updating it.  I am modifying a small women's leather coat to fit my doggy.  He likes clothes, really he does...and it's not really leather it's pleather.  That makes it somehow less cruel and less likely to taste good to Brewer.

Step One: Rip out any type of satiny lining and then measure the dog.


Step Two: I measured him and cut the sleeves off of the jacket.  I am setting those aside to make ipod cases, as well as any other scraps I cut out.  When I am sewing he tends to think I need to pay more attention to him...so he sits on my projects.


 Step Three: I am using the front as the back and the back as the front.  I ripped the seam that held the back halves together.
Step Four: Cut out an opening for the dog's male/female parts.  I usually measure from his sternum to his neck to see how much coverage he needs.  You are going to be cutting this out from the underneath.
Step Five: Using the first piece as a pattern, I cut the panel out of the other side also.

Step Six: I pinned under all raw edges and hemmed them.  Make sure to backstitch.


Step Seven: I tried it on Brewer and pinned the shoulders where the sleeves needed to be taken in.


You are going to need to reduce the size of the armholes and angle them downwards.  It sounds hard, but if you practice you get the hang of it.  You start out by using the original thread line as a guide, and line your foot up with it.  Then sew a new line further in.  Try it on the dog. If it's still too big repeat until it fits.  Trim off excess fabric.


Step Eight: Hem sleeves.

Step Nine: Try it on dog again.  As you can see here, I still need to take it in a tiny bit.  I also am adding a velcro (not my choice, as per my husband) strip along the belly as a closure.

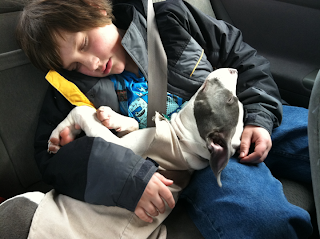
poor thing was sleeping during the fitting...he is a little disoriented here!

Sunday, February 27, 2011

Fat Quarter Dog Bandana

Ok, so my stepmother loves bandanas for her dogs.  A lot of times they are specialty or monogrammed, but they can be pricey.  You can make a bandana for about 50-75 cents...using half of a fat quarter.

Step One:  Choose your fabric.  We were at Joann Fabrics and my husband saw this guitar print he liked, so I grabbed it without knowing exactly what I was going to do with it.  When I got home and looked at Brewer, I decided he needed a bandana!

Step Two: IRON IT.  I can't emphasize the importance of the iron enough.  I HATE ironing, usually I am a very wrinkled girl.  But, if you want to have a good, straight cut, then you must iron the fabric.  Even better would be a prewash and an iron, but beggars can't be choosers and I'm lazy.  So I skipped the wash and just hit it with the iron.

Step Three: Cut it.  I used my handy-dandy Fiskars rotary cutter and my Quilting Mate mat by June Tailor, Inc.


When you cut it, it does not have to be a perfect triangle.  Cut it so you cut your fat quarter in half on the diagonal, which ever way will give you the longest base.

Step Four: Sew it!  I am not really a pinner, more of a presser.  So, I simply folded it under about 1/4 inch and quickly pressed it into place.  Then I went ahead and sewed it using a straight stitch on my lovely Brother (project runway limited edition thank you so much Tony) sewing machine.  My husband bought me this sewing machine because in December we lost nearly everything we owned in a house fire.  It was awful, and one of the losses was the sewing machine I had. So my honey went out and bought me an upgrade!


After I was done, I tackled Brewer and put the bandana on (actually he sits like a good boy when he gets dressed)  Sew cute:)

Saturday, February 26, 2011

New Vintage Fabric...Nana Destashed!

One of the best things about being a hoarder (not the extreme kind), is that I had to get the trait from somebody...and that somebody is my Nana. I went to visit her today for the first time since my Grampy passed away about a month ago. I have called her several times to check in, but unfortunately I
A) live an hour away
B) have a full-time job
C) had two sick kids and a sick husband for two of those weeks.

So, today was the big Nana-visit. I brought the boys and the dog, and of course Tony. While Tony and Dillon went out to the music store to buy some parts for Nana's organ; she dragged me upstairs to her fabric stash. Ashton watched the dog who watched the cat who was watching the dog...see photo below:


Holy cow! She has yards and yards of fabric that she had "big plans for" that never went through. Here are just a few things I scored:

1 1/8 yd of this lovely red wool. When I was about six (24 years ago), Nana purchased this fabric with the pure intent of making me a "Little Red Riding Hood" Cape. Today she resignedly handed it over to me, so I could do something with it for myself, as an adult. It is VERY tempting to make myself a cape, since there is that new movie coming out and all....Hmmm...but are there TOO many moth holes in it?? (Just a couple little ones).


She has a thing for PINK. She does look very lovely in pink, so I think it is definitely her favorite color. My Grampy loved her so much he even tolerated pink walls in his bedroom, and at one point in time the bathroom was pink too. So I have several pinks and of course the major score of unbleached muslin. Can NEVER have too much unbleached muslin.


Calico, calico, calico. Some of these prints are literally from when my mom was a young girl...Nana made her a dress and then would save the scraps. So, I am thinking some sort of a patchwork quilt. It would be my very first....so I am thinking a sampler.


MY FAB FIND OF THE DAY: This lovely piece of "choo-choo" created by Laura Jean Allen in 1953! I need to make myself something special out of this one, my Nana was very fond of it and didn't quite want to part with it...but also had no idea what she would ever do with it.


And lastly, some tapestry, etc. I can make handbags that she planned on making, but never got around to. I can't wait to get some of these fabrics into projects and post them...but I need to put the brakes on my mind so I can slow it down to a functional speed...And I do have homework due by Tuesday, so I might have to do that first.

So, at the end of the day (well, about three hours later), we were all tuckered out and headed on home.  I had a huge stack of new fabric to play with...and the kids and dog were exhausted!

Ashton and Brewer...the really scary pit bull.  GRRRR.  Isn't he scary?

Friday, February 25, 2011

Jeans and a sweater...how many things can I make out of them without sewing?


I used this to audition for One Month to Win it!!


Ok, so everybody at work knows I LOVE to repurpose old clothing.  So one friend gave me a pair of ripped jeans (ripped in the crotch...so not patchable unless you want to look ridiculous) and another gave me a sweater she had lost interest in.  So, I looked at my MESSY craft area and decided I needed to make some containers to store things in/organize without breaking the bank.  So here is what I have come up with so far.

Jean leg button container:

Materials:
pair of jeans
glue gun/glue sticks
scissors
marking chalk/pencil
snap
fabric scraps/ribbon
button


Step One: Fit the leg of the pants over the coffee can and measure the length of the can.  Cut the leg off where you marked, make sure you have allowed some room for a "seam allowance" so you can tuck under the raw edges.


Step Two: Fit the can inside the leg, with the bottom of the leg at the bottom of the can.  Tuck under the raw edge and hot glue it into place.


Step Three:

Hot glue the ribbon of your choice over the top edge.


Take your scraps of fabric, and using a circle and cut out three circles of fabric.  This fabric flower will be used to decorate the container.


Step Five: Cut six slits 2/3 in and around the exterior of the circle, leaving it attached in the center!

Step Six: Round off each of the petals individually.

Step Seven, stagger and stack your three flower pieces, placing your "favorite" on top.  In between each stack put a dab of hot glue, and pinch the flower inward to give it a little dimension.


Step Eight: Glue a button or two to the center, and glue the flower to the container, I chose to center it on the seam.


Step Nine: I am using this to store buttons, and now that I have added all of this extra fabric, etc...there is no way the lid will fit back on.  So, I had to improvise.  I started by cutting one of the back pockets off of the jeans.  Sorry I was cutting with one hand and photographing with the other...dangerous I know, but it ended up blurry as a result...


Step Ten:  I used a snap, but you could use a tab/loop or any closure you would like.  to keep it no-sew I hot glued the male end to the can and the female end to the tip of the pocket.


Step Eleven: Snap it on, and then stretch the pocket over the top of the can.  Hot glue the edges to the back.  I did each corner first, then gathered the slack in the center and voila! Lid is on.


t

Step Twelve: Turn it right side up...fill it...and snap it!


I know, it's sideways, and I tried to flip it...but computer not cooperating!

My buttons are happy now;)

Work of Art #2: Jeans and Sweater Storage Box

So, for my second project, I decided to utilize a good, sturdy shoebox I had.  I used a lightweight sweater, hot glue, a button, and the rest of the jeans...well not ALL of it!

Step One: Cut the Backside of the jeans off, make sure the piece is at least large enough to cover the top of the lid.  It would be even better if it covered the edges too...but mine didn't.  


Step Two: Set that piece aside, and cut along the seam to open up the leg (this is only if you don't have enough butt to cover the edges...you will see what I am doing;)

 Cut two long strips--they need to be twice the width of the box lid edge.  I used the seams as finished edges, look below to see what I mean.  Then hot glue the edges to the lid of the box.

Step Three:  Continue hot  gluing each piece around the entire box.  Then glue the top edge so that it sticks, and overlap the lid and glue it down so that it is going to be covered when you add the "butt" to the top.


see how I am gluing it to the TOP of the box too?  I want it to overlap in the end.


Step Four: After you have the edges covered, it's time to put the top on...so position it on top and you are going to tuck under the raw edges and hot glue them in place.


Step Five: Prepare the sweater to line the box.  Cut off the sleeves and cut along one seam to make a flat sheet of fabric.


Step Six: Hot glue the edges of the sweater into the inside edge of the box.  It won't be perfect...well mine wasn't.  Just as long as it covers the edge...I really stretched and pulled the fabric to get a snug fit.  


Step Seven: Take the rest of the fabric and cut it so the edges are straight.  Then I just laid it inside the box and hot glued the edges to the top, as neatly as I could to make a liner.


Step Eight: I had to make a flower, so I cut a strip of sweater leftovers about 2" wide.  


Step Nine: Using hot glue, glue and gather the bottom edge.  Work the fabric into a simple flower.

I added a button center and glued the whole thing on near the pocket.


TA DAH!  It's not perfect, but it's definitely going to be a cute organizational tool for my sewing stuff!!

And...this pair of jeans and sweater have more coming from them...Maybe tomorrow after we visit the Great-Nana;)

And I promised...so I am going to deliver.  Here is the plethora of storage containers I made.  The base objects are 3 coffee cans, 2 shoe boxes, an oatmeal container, and one thread container.