Tuesday, August 23, 2011

mosaic for audition


So, I have been waiting about six months to audition for SYTYC.  The below project is my failed attempt at making it in the top ten.  I am upset, since it makes me feel like a failure, but OH WELL.  I guess it's one less thing to worry about doing, and I tried.  And I didn't do what some other people did...like bloggers with hundreds or thousands of followers that put their kids names, pictures, and even made a list with family members on it.  So what if somebody made a tripod into a lamp?  I made a DRUM into a lamp!  I will live, move on, and maybe contact the other three LOSERS to join me in our own, different competition:)


So, I tried to create many different "audition pieces" for SYTYC. Not that they weren't good, but I just didn't feel they were good ENOUGH. So, I was reading Chica and Jo's post that had an invitation printed on a paint chip....and BOOM I had an epiphany. I love doing mosaic, but tiles are super expensive, grout is super messy, and I have done it with smashed plates but even those take up space to collect. So I decided to use paint chips. They are free, plentiful at your local Walmart or hardware store, and they are...FREE

I started off by priming the laminate and then painting over it with a blue acrylic.  Then I used a clean rag to wipe it off and give it a nice faux-finished ragged look.
Then I stole acquired a billion different paint chips, (by the way, walmart has GIANT paint chips) and using mod podge and a design I pulled out of my head....achieved this look.  You can also gently sketch the design and fill it in as you go.  Work in small areas at a time, and let the mod podge get a little tacky before you start filling in with the paint chips.

To stay organized, I had cut the chips up and put them in a divided tackle box container by color, and this made working super fast and easy!

Wednesday, August 10, 2011

Memory Quilts

So, my friend Jen asked me if I could make a quilt out of her kids' baby blankets. I figured, hey, why not? So, I worked out a design, since she likes the cupcakes and ice cream cones, I went with that...but added layer cakes since she is a cake designer.

As usual I started off by measuring and cutting squares, then I used all of the scraps to create the applique and borders. Keep in mind, I used ONLY the materials given to me by Jen, with the exception of some fusible web and thread...and this is what we have come up with as a result. No more wondering how to keep your kids blankets or even their baby clothes that are hard to part with:


Hope you like...and hope you decide that you can put those blankies to good use! Would be great to pass down for generations!

Guest Post: A Burp Cloth Makeover

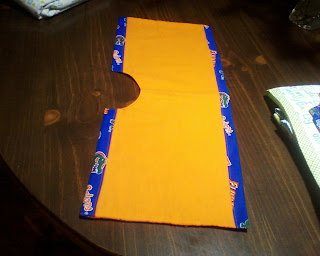
In June, I received an email from Udeni Rosario, who told me that she had seen my burp cloth tutorial and decided to give it a shot. And she made them even better!! She used left over receiving blanket fabric and added a self-binding border with mitered corners. I am so very honored that somebody used my very simple idea and made it so beautiful!


So, thank you to Udeni Rosario for sharing her amazing creations with us! I know I've been absent lately, but I have definitely been crafting! I have several projects up and coming...especially since I have been working on my audition project for So you think you're crafty! Please make sure you go and vote. I will let you know when they are up. Vote for your fave! (hopefully it will be mine) :)